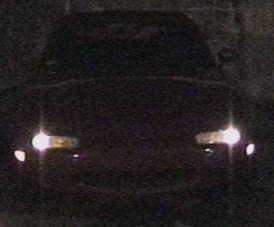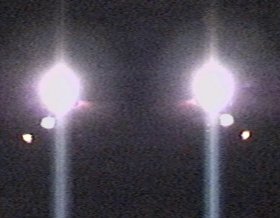


A picture is worth a thousand words! This is how the end result looks. Rather than the parking light and turn signals being the same amber bulb in the same housing, the parking lights are now small white bulbs in the outside portion of the lens, while the amber turn signal functions the same as before in the main lens. This is how Miata lighting is set up in Europe. I like the way it looks, because it's different, and also because it makes the turn signal much more obvious at night. Rather than a light getting brighter and dimmer, it's a very clear on/off flash.
There is a "TwiLights" kit out there that does the same thing, except they are wired to have white or amber bulbs in the corner lenses and the regular amber parking lights. Plus there's a daytime running light module in there somewhere. And the kit costs $30 plus shipping. My way cost a grand total of $7.32, including tax! Here's how I did it.
Here's what racked up that mind boggling overwhelming price tag:
(1) package of clear bulbs, part #194.
(2) license/sidemarker sockets for GM/Ford, part #85814.
That's it - two sets of bulbs and sockets. Mazda designed the front lenses to use both bulbs, but only uses the one on American models and leaves the smaller corner lens plugged up. So there are two parts to this mod: Creating the hole in the back of the lens for the socket to plug in, and splicing the wiring into what's already there.
A screw on each side of the lens lets you remove it. Twist the existing parking/signal bulb to remove it, and you can take the lens inside with you. Look at the back, and you'll see a small circle behind the outer corner of the lens that looks like it could be removed and a bulb put in there. Guess what? That's exactly what we're going to do.
I started by slowly drilling a pilot hole in the middle of this circle. Be careful - the plastic is pretty soft, so it doesn't take much to get through it. That means if you lean on the drill too hard, you'll start punching through the clear part of the lens, which would be bad. From there, I took a 5/8" bit and enlarged the hole to that size. That's still not quite big enough to get the socket in there, so out came the dremel tool to open things up just a tiny bit more.
There is also a thin plastic wall that juts out and surrounds the hole you are creating. This wall will prevent the socket from plugging in properly, so it has to go. I just used a pair of needlenose pliers and bent parts of it back and forth a couple of times until they broke off. Then I smoothed it out a bit with the dremel afterward.
At this point, you should be able to plug the socket with the bulb into the hole. That's all there is to it. Don't forget to do this on the other side, too. :)
There are three wires going to the original bulb. Green is turn signal power (leave this one alone), red is parking light power, and black is ground. So we have this second socket that we want to add to this. Black will be ground on the socket as well, and whatever color the other wire is will be power.
First I snipped the ground wire, then soldered it back together with the ground from the new socket in there as well. Then I snipped the red wire (parking light power) and soldered it to the power lead from the new socket. This disabled the stock parking light, since that wire was cut, but enabled it in the smaller corner light. Turn signal operation was unaffected.
It doesn't take a rocket scientist to figure out that you could easily wire it up differently if you want. You could leave the stock parking light enabled by soldering that wire back in when you attach the new socket. Or you could make the corner light your turn signal rather than the parking light like I did. And you can use an amber bulb rather than a clear one. There are many possibilities - this is simply how I chose to wire mine.
 Turn on the parking lights
and the hazards. If they all work the way you wanted, you did it
right. :)
One caution about the way I wired the parking
lights. They're perfectly fine for being parked, but not
particularly visible while the car is in motion, unlike the
original parking lights. They're not really bright enough to
safely go driving around at dawn or dusk with the parking lights
on and the headlights off. But the way I see it, parking lights
are for parking, not driving. So if it's dark
enough for me to want to be illuminated from the front, I should
just turn on my headlights. Even the sealed beams tremendously
outshine the parking lights, but that's OK.
Note from Charlie Ranlett
I drive around with my parking lights on for visibility, and I didn't like those corner reflectors not lighting up. At the same time, I didn't want to convert my main lights to white - that looks funny to me. What I wanted to do is have a nice amber glow from corner to corner. So, I followed the instructions as above but bought the amber versions of the lights. I soldered in the ground and the red (parking) connector, so I have a fully illuminated lens at all times. I then noticed that the corners were a lighter amber than the main lights. For some reason, the lights I bought had a darker tinted "cap" and a lighter tint around the cylinder of the light. I went to the local hobby store and got a little bottle of Tamiya clear orange paint and painted my new bulbs. Works like a charm! Now I have a more visible, better-looking Miata.
| Back to the Garage |
15 June, 2011 |
| [Home] - [FAQ] - [Search] - [Sponsors] - [Forums] |
| [Garage] - [Clubs] - [Contact Us] - [Disclosures] - [More...] |
Copyright
©1994-2024, Eunos Communications LLC
|